Automated end to end CI/CD pipeline for Java Spring boot project


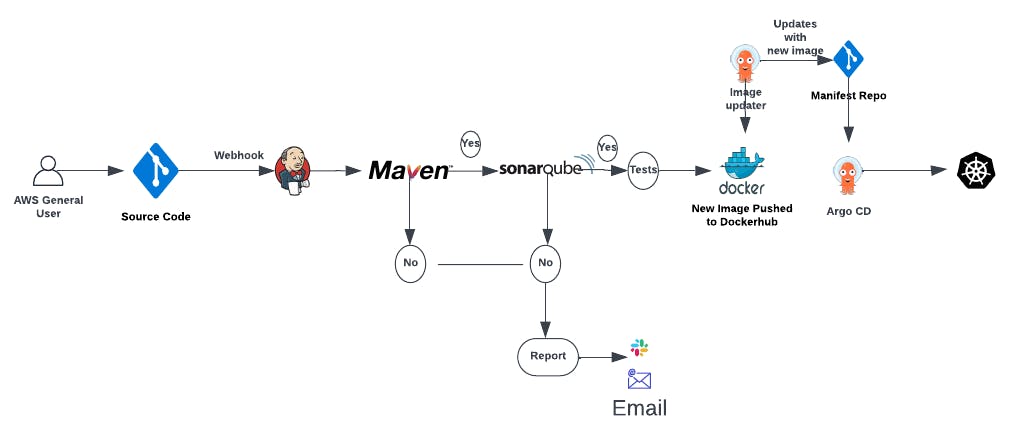
In this article, Our goal is to enable you to seamlessly build, test, and deploy a Java Spring boot application to your Kubernetes cluster with ease and efficiency. By implementing this pipeline, you'll experience the benefits of continuous integration and continuous delivery, as every code push to your GitHub repository triggers an automated deployment process.
Prerequisite:
GitHub and DockerHub account
AWS account and knowledge of EC2 instances
Knowledge of Jenkins, Docker, and Maven
Step 1: Setup Jenkins Server on EC2
First set up the Jenkins server to create a pipeline. Launch an EC2 instance and install Java and Jenkins into it. You need to install Maven, Docker and Sonarqube as well. Maven to build the Java project, Sonarqube for static code analysis and Docker to build and push the docker image in Jenkins. SSH into your instance and install Maven and Docker using the below commands. For EC2, I am using an Ubuntu 2t.large instance.
Install Java
sudo apt update
sudo apt install openjdk-11-jre
Now, you can proceed with installing Jenkins
curl -fsSL https://pkg.jenkins.io/debian-stable/jenkins.io-2023.key | sudo tee \
  /usr/share/keyrings/jenkins-keyring.asc > /dev/null
echo deb [signed-by=/usr/share/keyrings/jenkins-keyring.asc] \
  https://pkg.jenkins.io/debian-stable binary/ | sudo tee \
  /etc/apt/sources.list.d/jenkins.list > /dev/null
sudo apt-get update
sudo apt-get install jenkins
Install Maven and Docker on the EC2 Instance.
# Install Maven in Jenkins
sudo apt-get install maven -y
## Update packages
sudo apt-get update
## Install Docker
sudo apt-get install docker.io -y
Grant Jenkins user and Ubuntu user permission to docker deamon.
# Switch user to root and grant both jenkins and ubuntu
# user permissions to docker deamon
sudo su -
usermod -aG docker jenkins
usermod -aG docker ubuntu
# Restart docker
systemctl restart docker
1.1 Login to Jenkins using the below URL:
http://:8080 [You can get the ec2-instance-public-ip-address from your AWS EC2 console page]
Note: If you are not interested in allowing All Traffic to your EC2 instance 1. Delete the inbound traffic rule for your instance 2. Edit the inbound traffic rule to only allow custom TCP port 8080
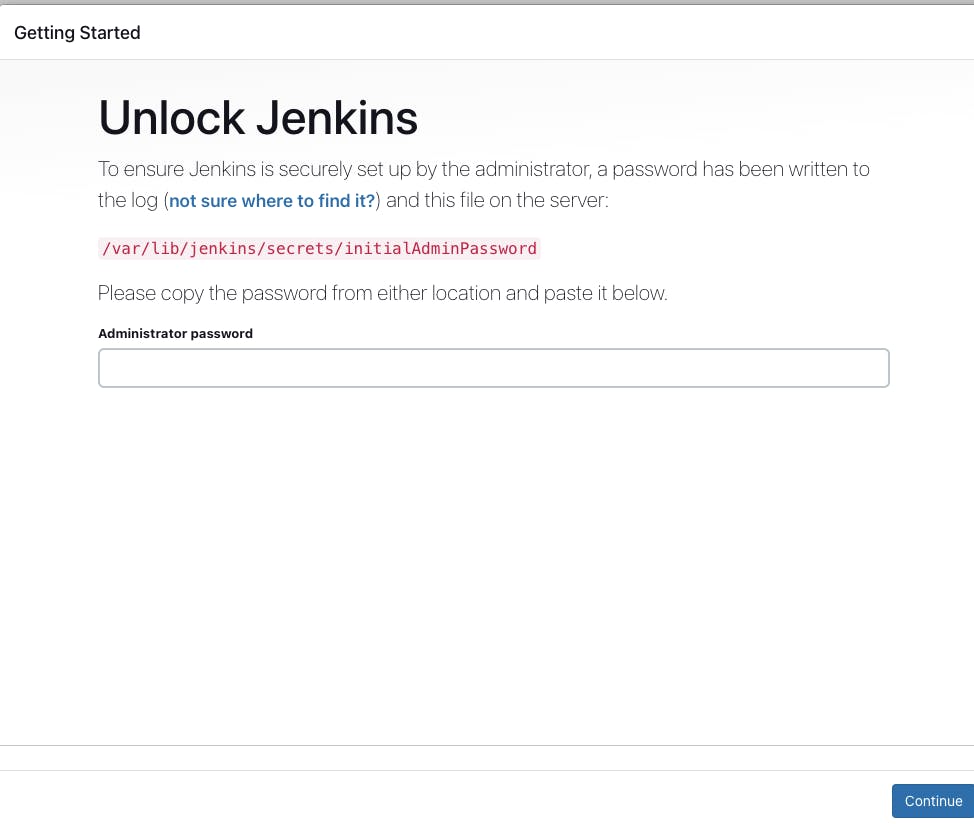
After you login to Jenkins, - Run the command to copy the Jenkins Admin Password - sudo cat /var/lib/jenkins/secrets/initialAdminPassword - Enter the Administrator password
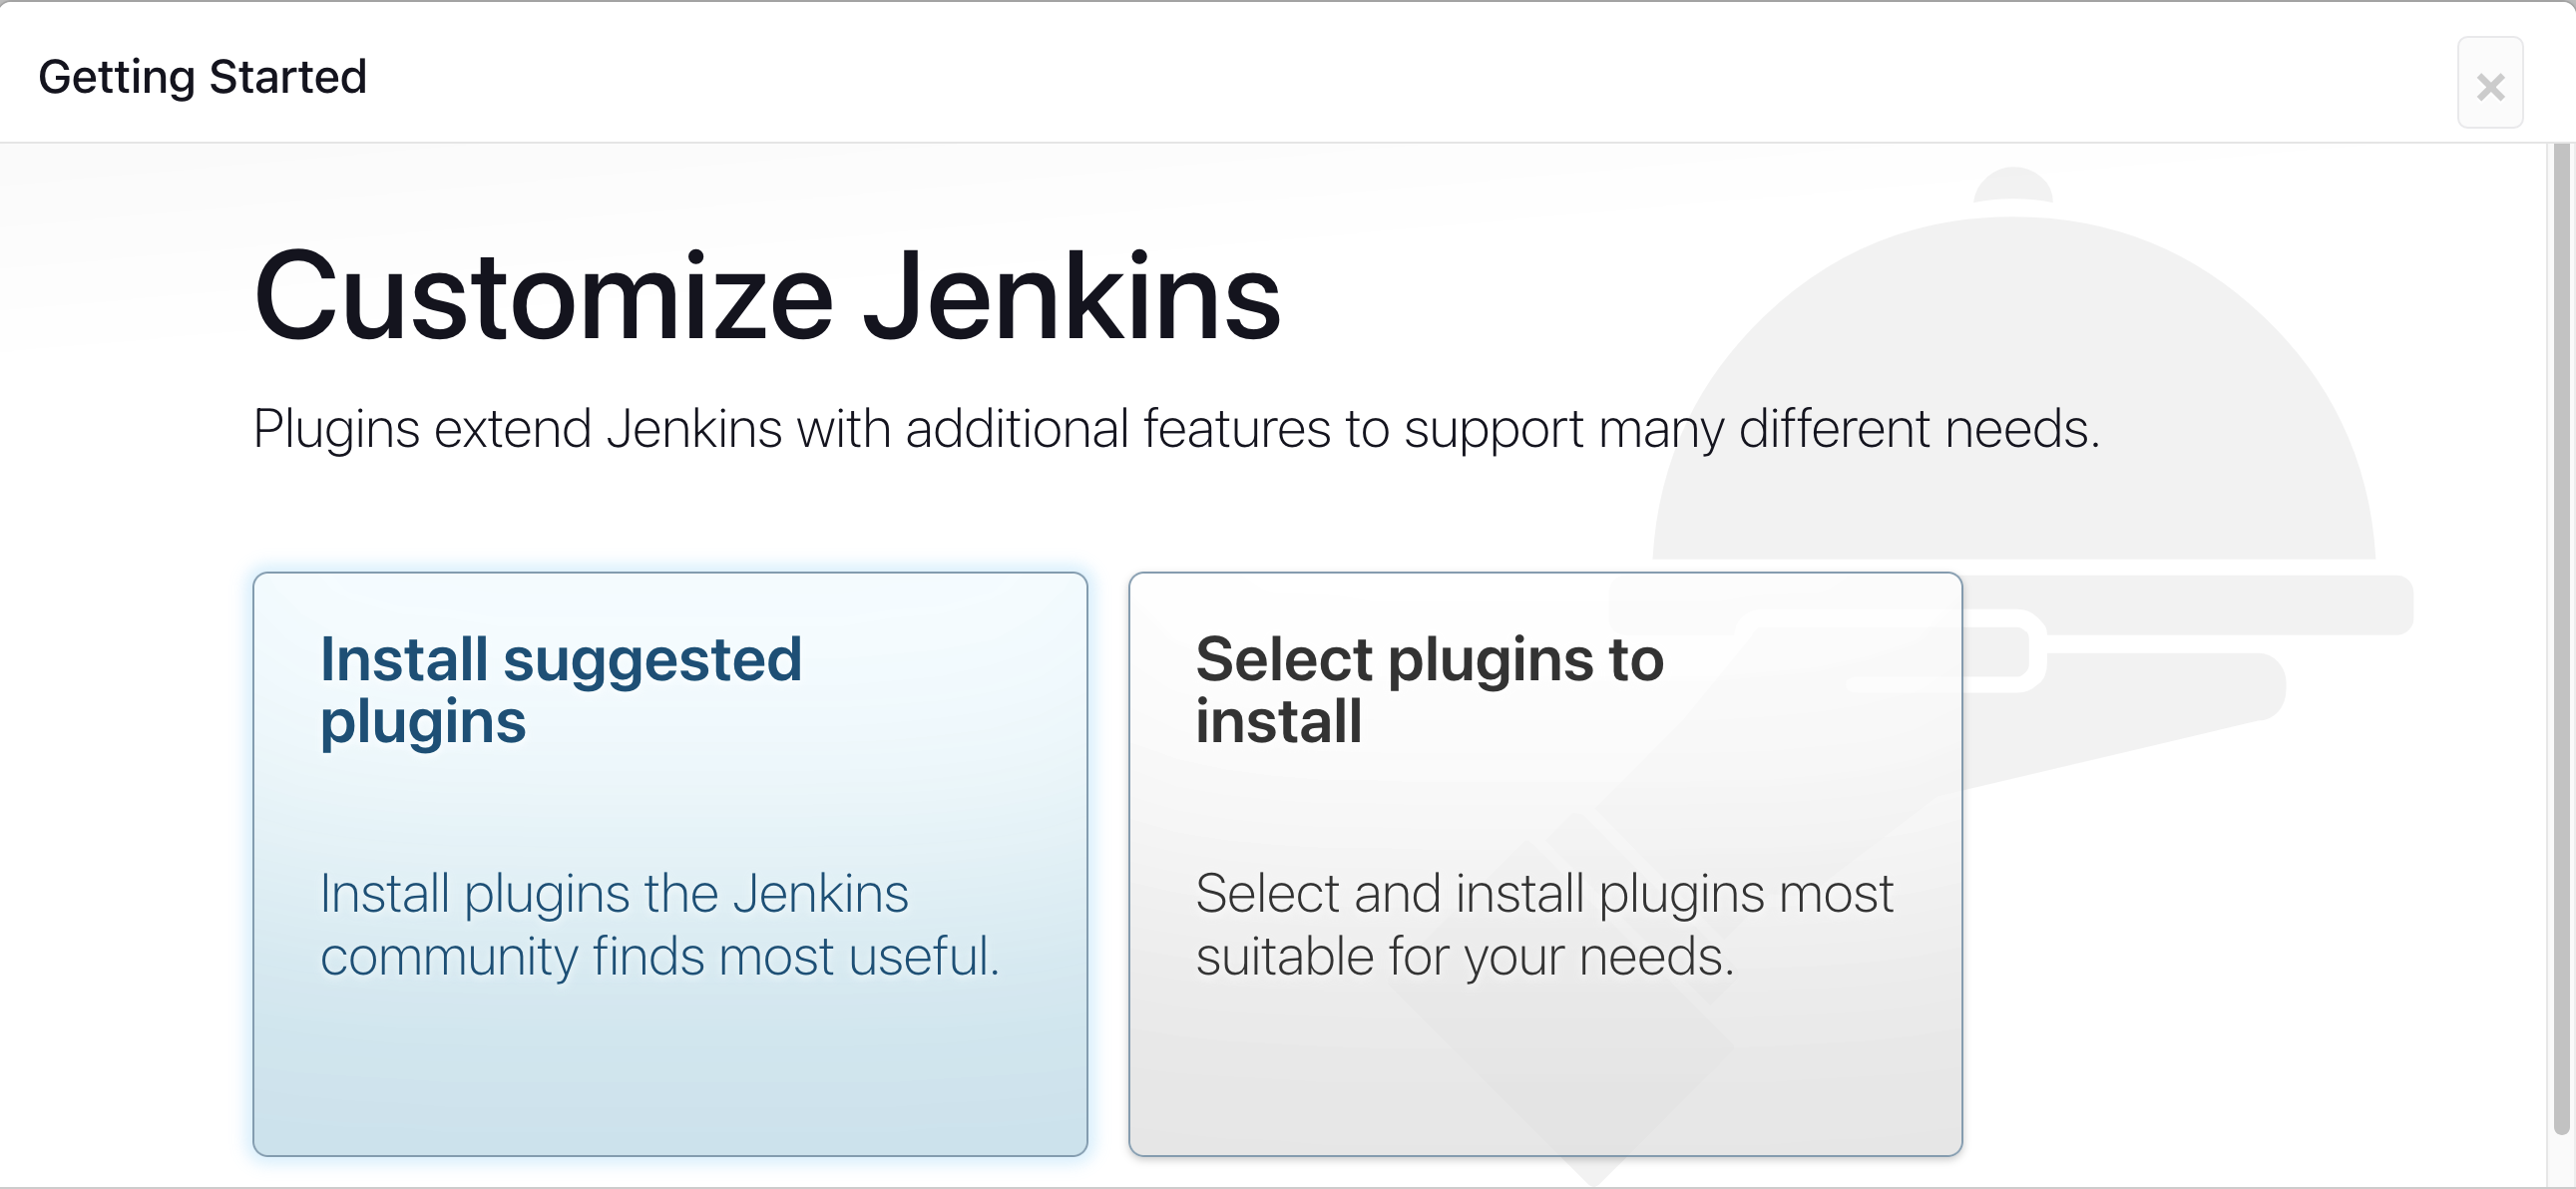
Click on Install suggested plugins
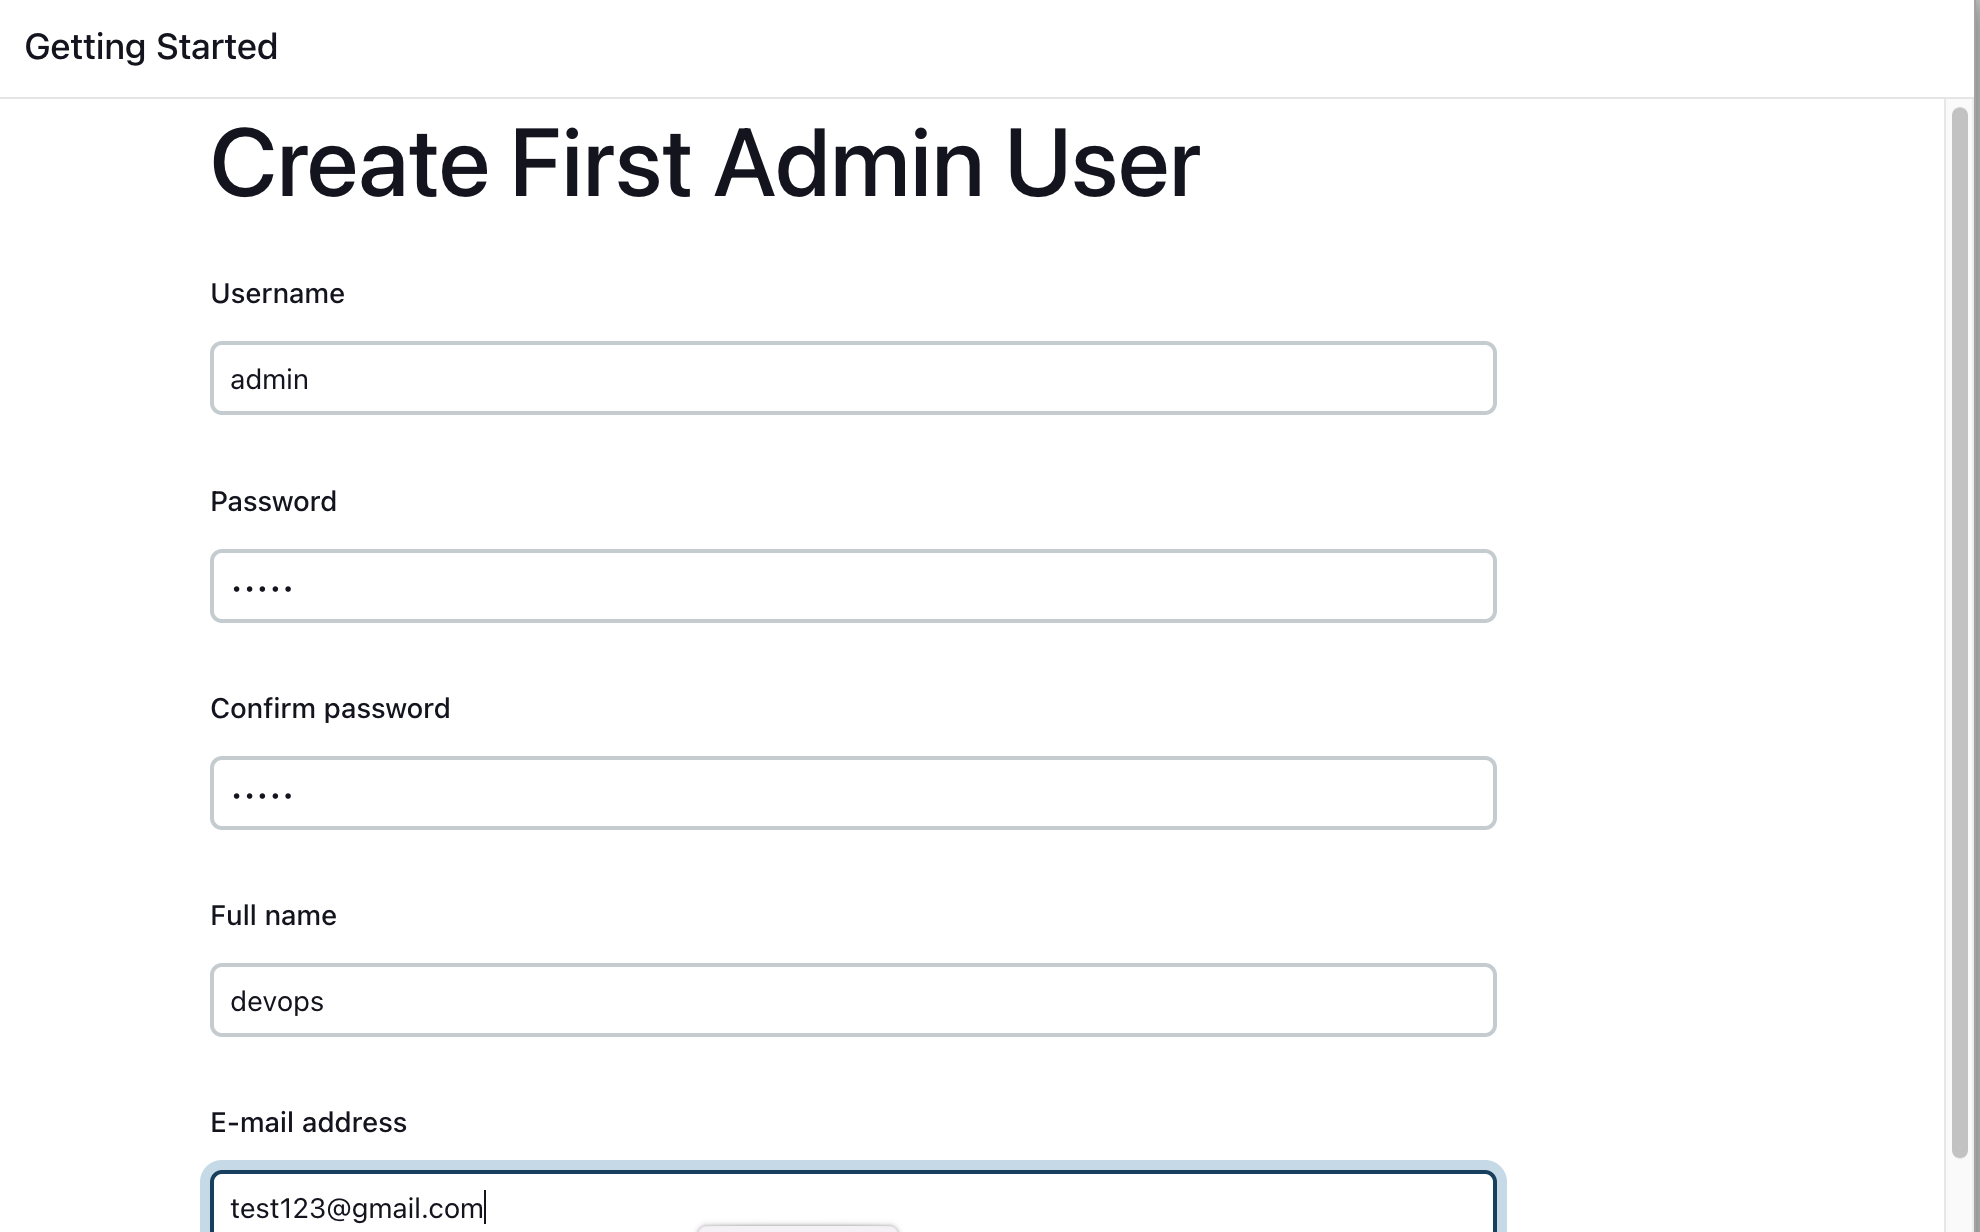
Create First Admin User or Skip the step [If you want to use this Jenkins instance for future use-cases as well, better to create admin user]
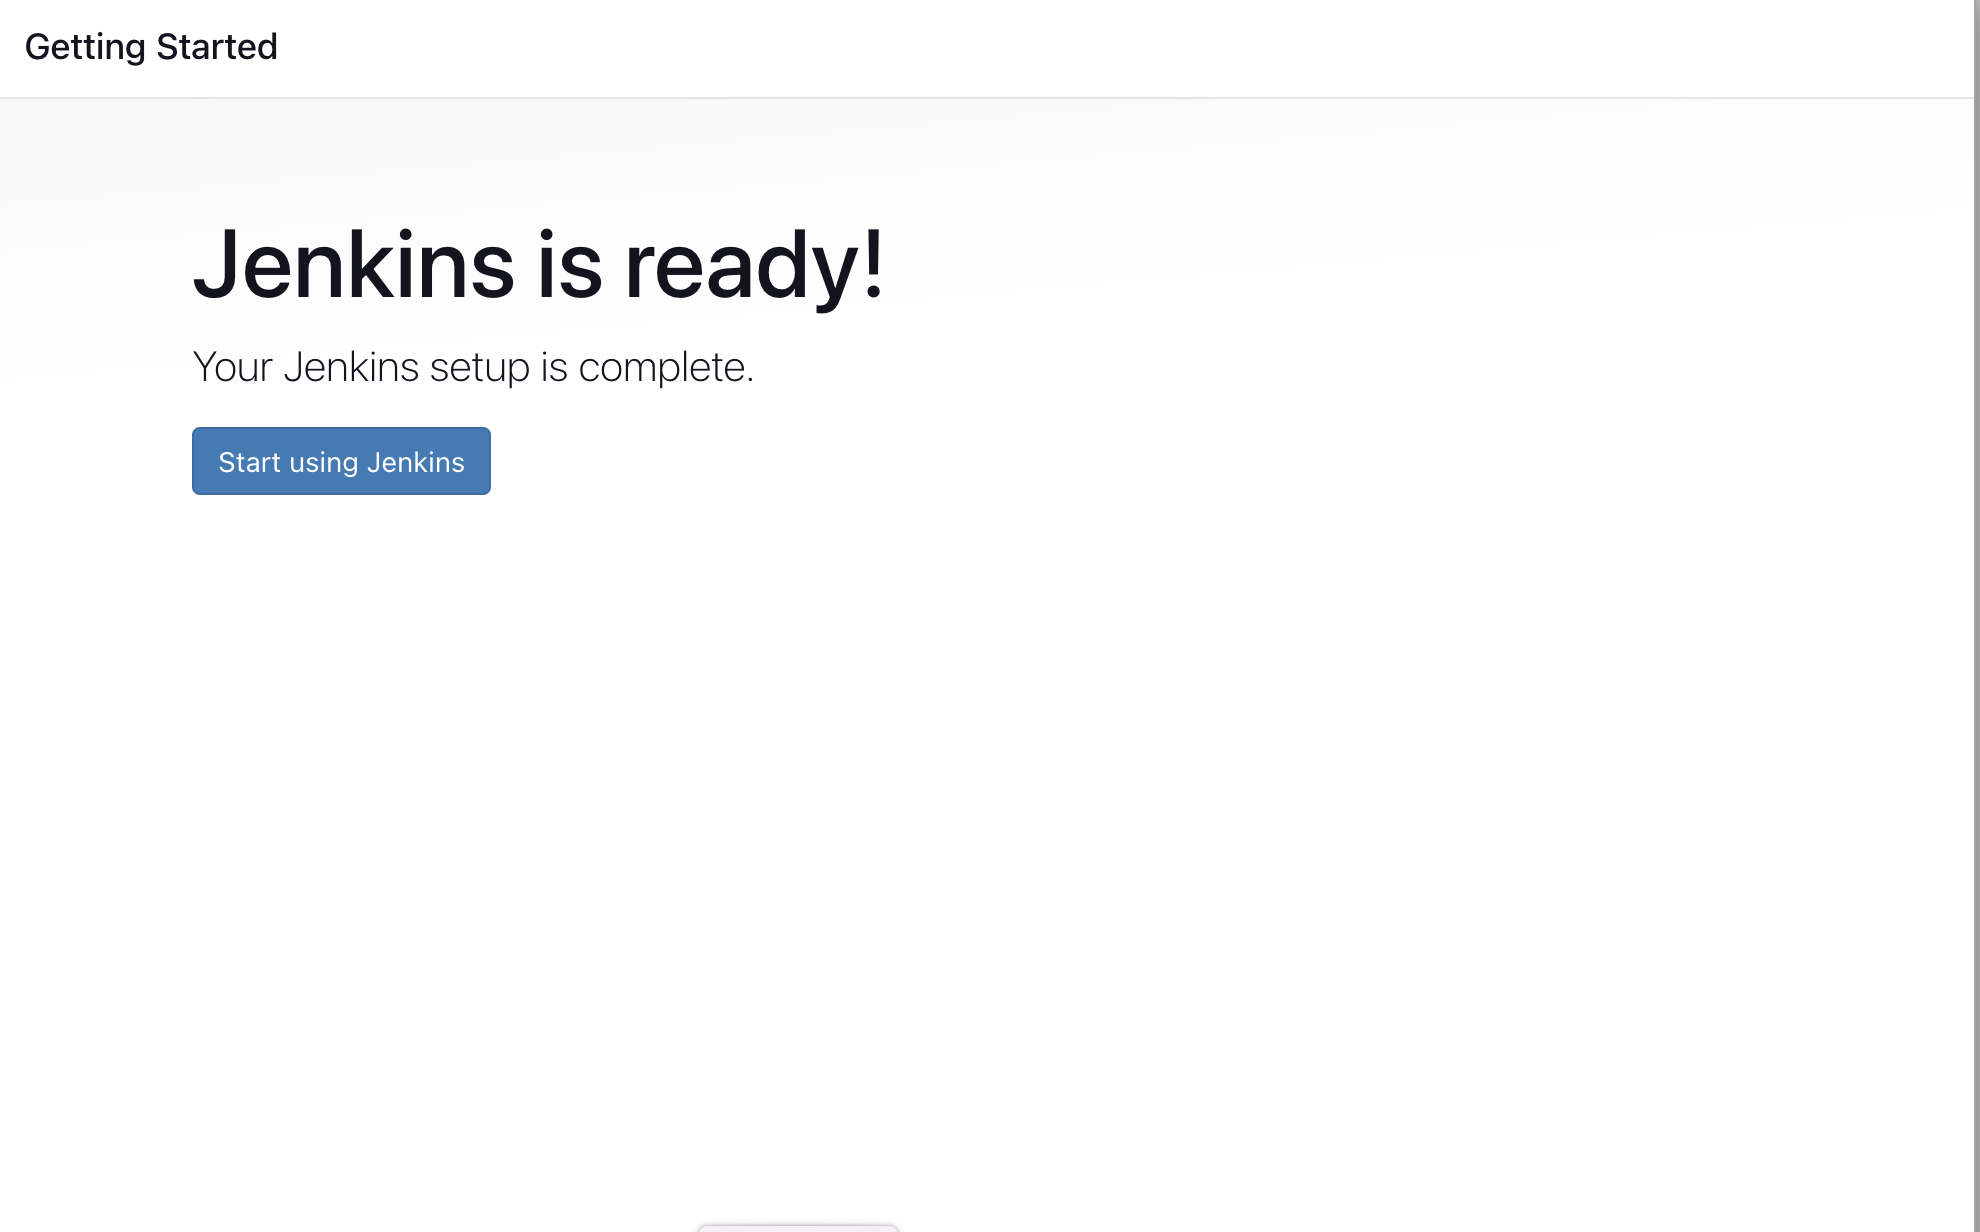
Jenkins Installation is Successful. You can now start using the Jenkins
1.2. Install Jenkins Plugins
Install plugins to integrate Jenkins with GitHub, Maven, and EC2. Go to Manage Jenkins, and select Manage Plugins. Under available plugins search for the below plugins and Install without restart
Pipeline maven integration
Docker Pipeline
SonarQube Scanner
Once all plugins have been installed, it is recommend to restart your jenkins.
1.3. Configure SonarQube
Install and configure Sonarqube server.
## Install Unzip
apt install unzip
## Add a Sonarqube user
adduser sonarqube
## Switch to the new user created
sudo su - sonarqube
## Install annd grant Sonarqube necessary permissions
wget https://binaries.sonarsource.com/Distribution/sonarqube/sonarqube-9.4.0.54424.zip
unzip *
chmod -R 755 /home/sonarqube/sonarqube-9.4.0.54424
chown -R sonarqube:sonarqube /home/sonarqube/sonarqube-9.4.0.54424
## Start the sonarqube server
cd sonarqube-9.4.0.54424/bin/linux-x86-64/
./sonar.sh start
Hurray !! Now you can access the SonarQube Server on http://<ip-address>:9000
Go to My Account, Security to generate and copy the token to be used by Jenkins.

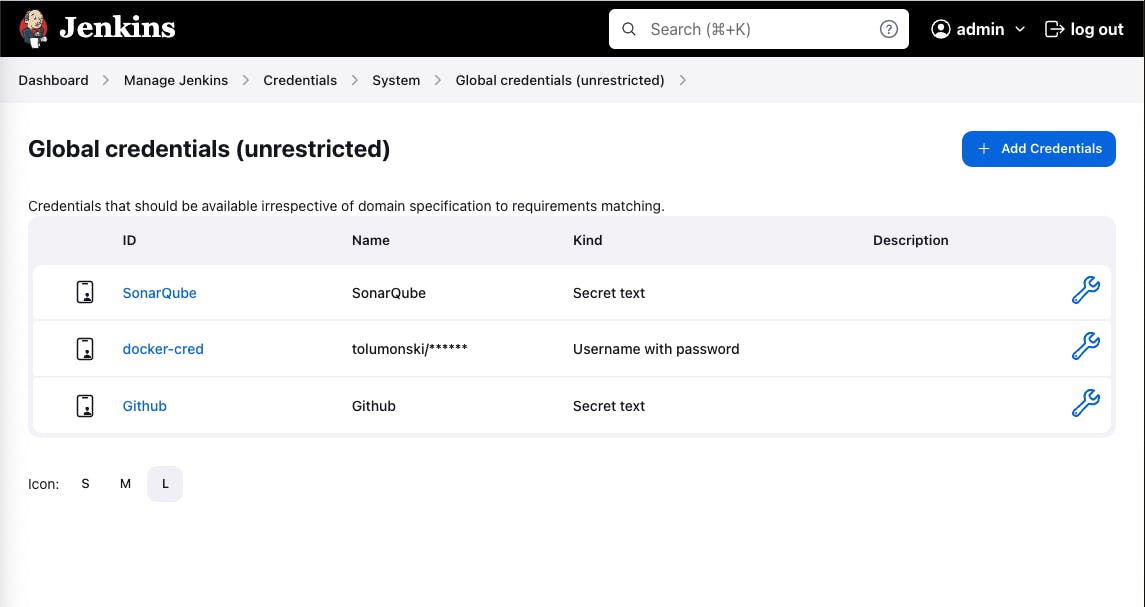
Go to the Manage Jenkins, Manage Credentials, System, Global Credentials and Add Credentials. Select Secret text as the kind and paste the copied token from sonarqube into the secret.

Also, we need to add other credentials needed by the pipeline (Dockerhub and Github) to Jenkins Credentials.
For Dockerhub, we only need to use Username and password and fill the details with your Dockerhub details as shown below and create your credentials;

The next thing we need to do is to add our Github credentials.
The GitHub credentials can be generated from your Github account under Settings, Developer Settings, Personal access tokens and Tokens (classic)
Choose Secret Text and paste your newly generated token from Gitub into the Secret as shown below;

We should have 3 credentials added to our Jenkins credentials in total.
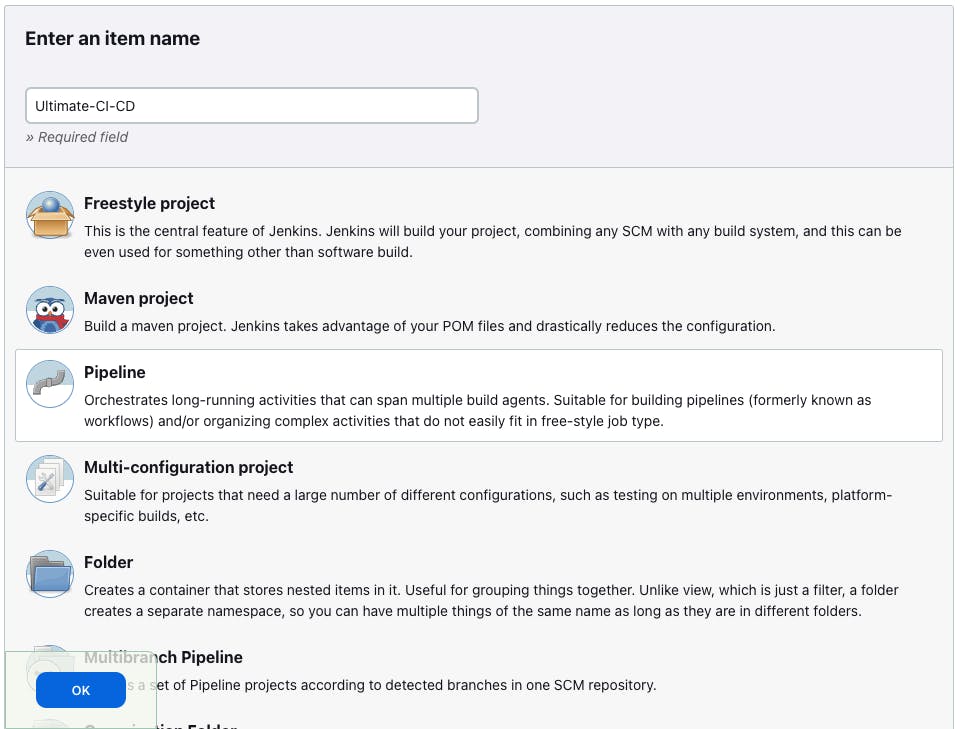
1.4. Create a Jenkins pipeline
Create a new pipeline by selecting "create a job"

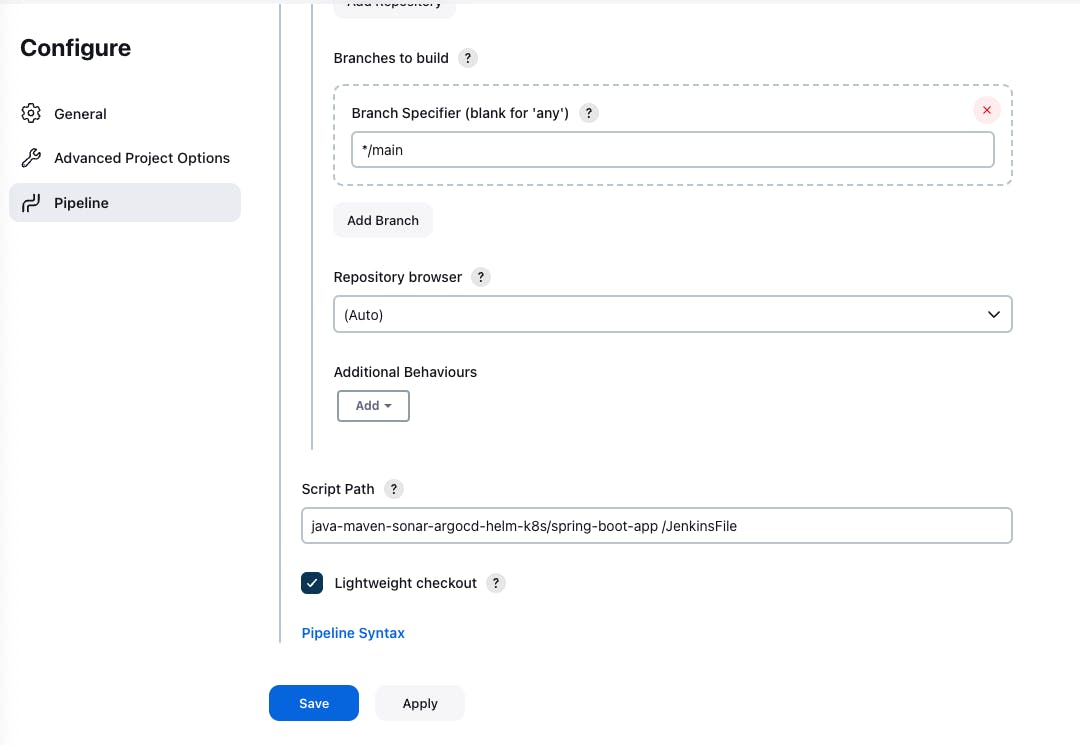
Add your repository path for your project into the Repository URL

Ensure the branch you use in the Jenkins pipeline is the same as the branch on your Repository. Copy the path to your Jenkin's file into the script path from your repository.

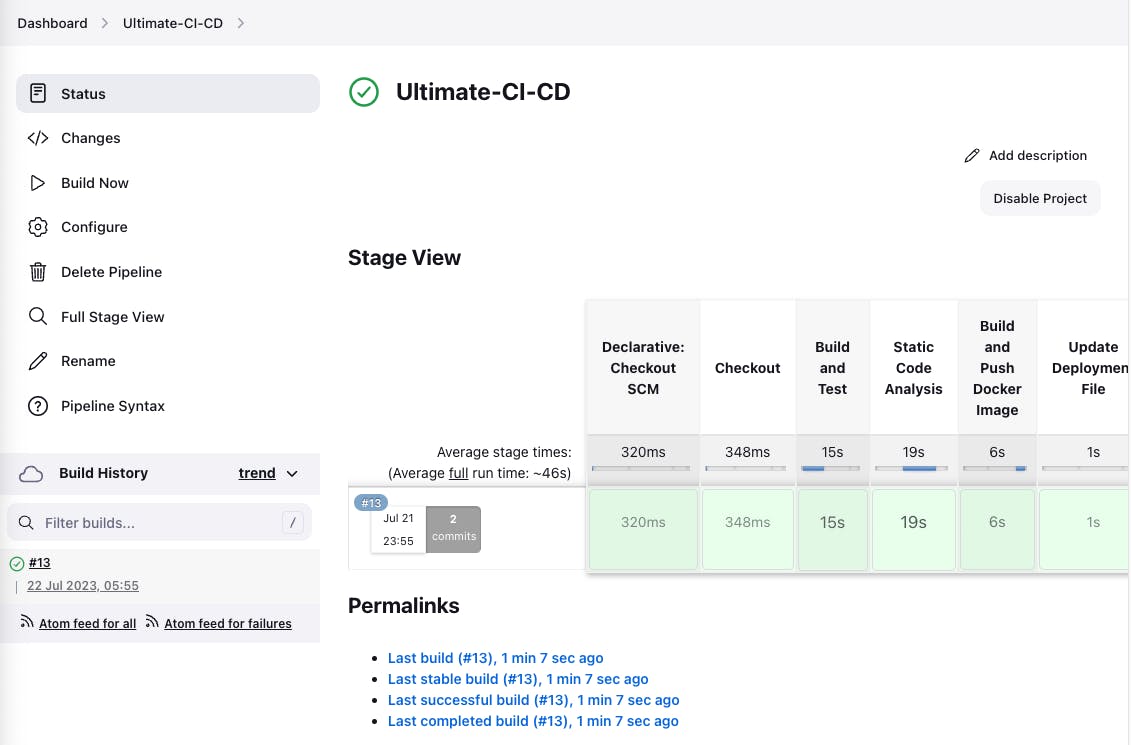
Select Build now, if all your configurations on your Jenkinsfile are in agreement with the configurations you have Jenkins pipeline and Jenkins credentials, you should have a successful build as shown below;
Now with a successful Jenkins pipeline, we can check the SonarQube to see the status of the application. Select Projects in sonarqube, select the project and you should have a dashboard like this;

with this, we have successfully implemented the CI part. we will now use Argo CD to deployment automatically unto Kubernetes. Check the status of your minikube at this stage; (Note that the kubernetes is running on our local machine and not the EC2)
Continous Deployment
Step 2: Install Kubernetes Cluster and Controller (Argo CD)
The Kubernetes cluster can be installed directly on your laptop/local machine. Open a new Tab on your Terminal. Run a minikube cluster using the hyperkit driver (for mac users).
minikube start --memory=4098 --driver=hyperkitminikube start --memory=4098 --driver=hyperkit
When deploying Kubernetes controllers, it is highly recommended to utilize Kubernetes Operators for the installation process. Kubernetes Operators are purpose-built automation agents that manage the lifecycle of complex applications or controllers within a Kubernetes cluster.
2.1 Install Kubernetes Controller (Argo CD)
Goto operatorhub.io to search for Argo CD.

Follow installation instructions to install Argo CD controller using operator;

minikube status

Create the Argo CD Controller.
Navigate back to the kubernetes controller (Argo CD) installation website (operatorhub.io). Copy the yaml command under the usage section and create a yaml file on your local machine.

# Create a yaml file for the Argo CD controller
vim argocd-basic.yml
#paste the following into the yaml file
apiVersion: argoproj.io/v1alpha1
kind: ArgoCD
metadata:
  name: example-argocd
spec: {}
#Apply the controller file
kubectl apply -f argocd-basic.yml
To run the pods on a browser (UI); run the following command. The "example-argocd-server" is responsible for the ArgoCD UI. change the "example-argocd-server" from ClusterIP to Nodeport.
kubectl get svc
kubectl edit svc

To execute on browser, use the minikube service command below to generate a URL to access the ArgoCD
minikube service argocd-server
minikube service list
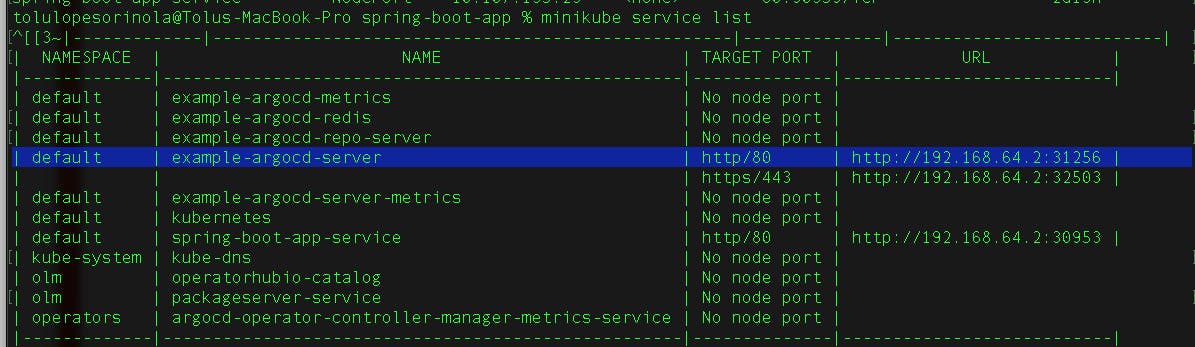
copy the url to access ArgoCD through a browser;
The default username for ArgoCd is "admin". To get the password, run the following commands
kubectl get secret
kubectl edit secret example-argocd-cluster
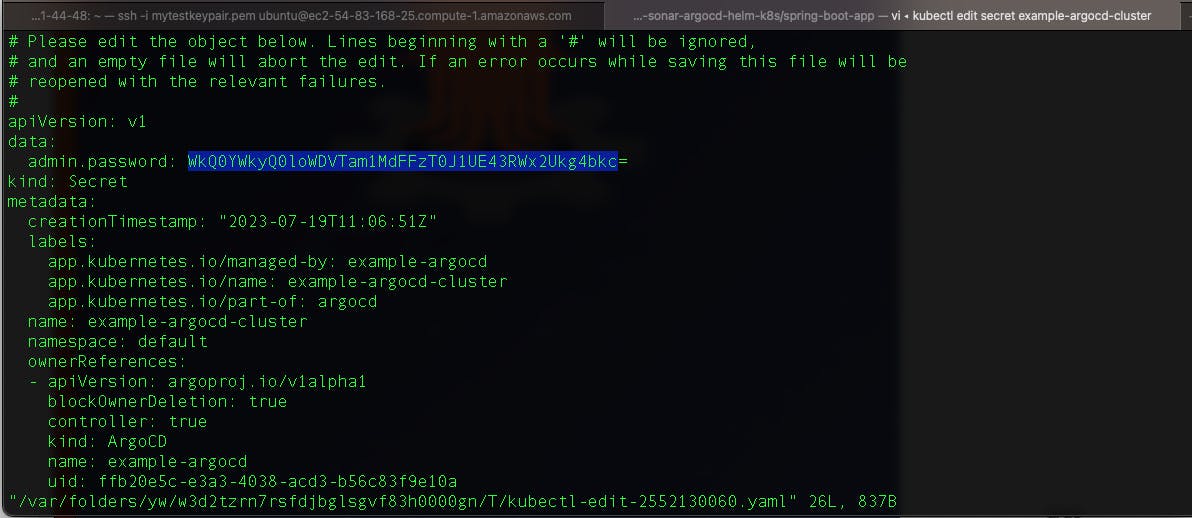
Kubernetes secrets are base64 encrypted and are not in plain text. To convert to plain text, copy the admin password and enter the command below;
echo <admin password copied> | base64 -d
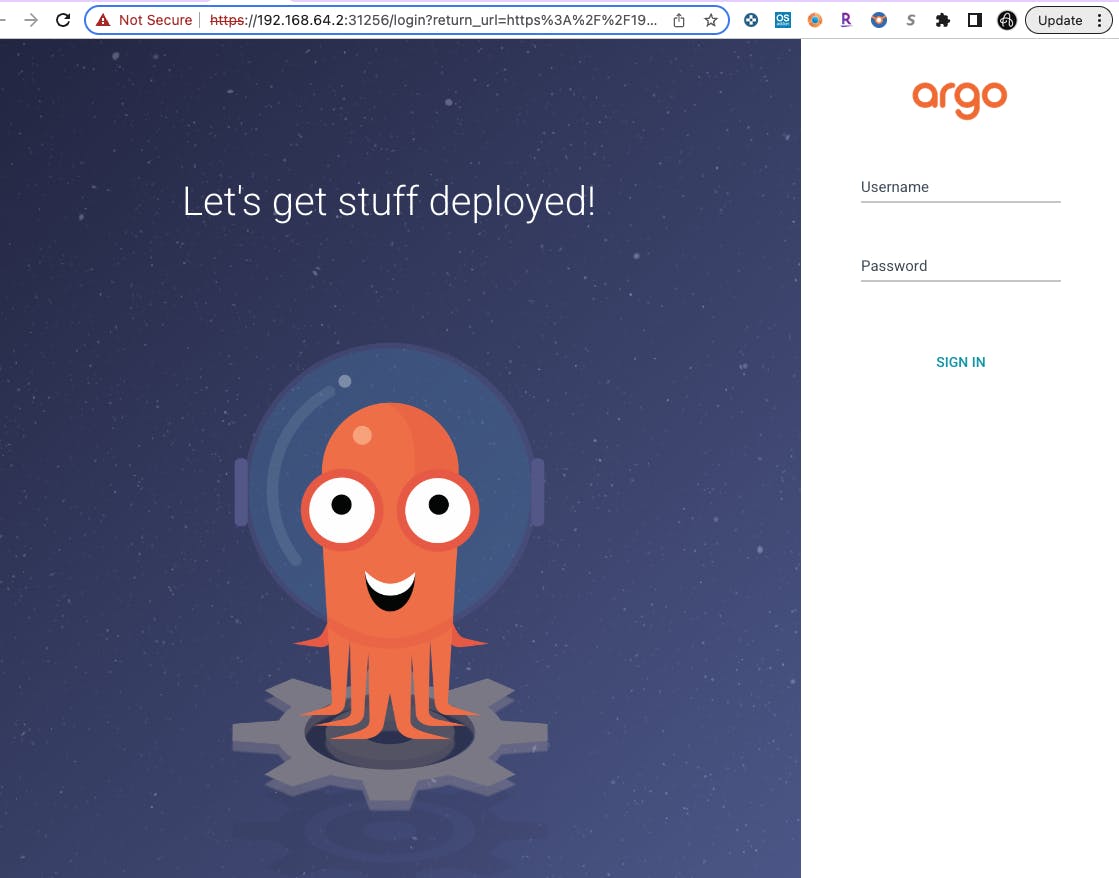
Now, you should be into your Argo CD dashboard;

From the Argo CD dashboard, we can see our springboot java application was successfully deployed and we will also look at it through a web browser.

Run the minikube service list to generate the url to view the app.
minikube service list
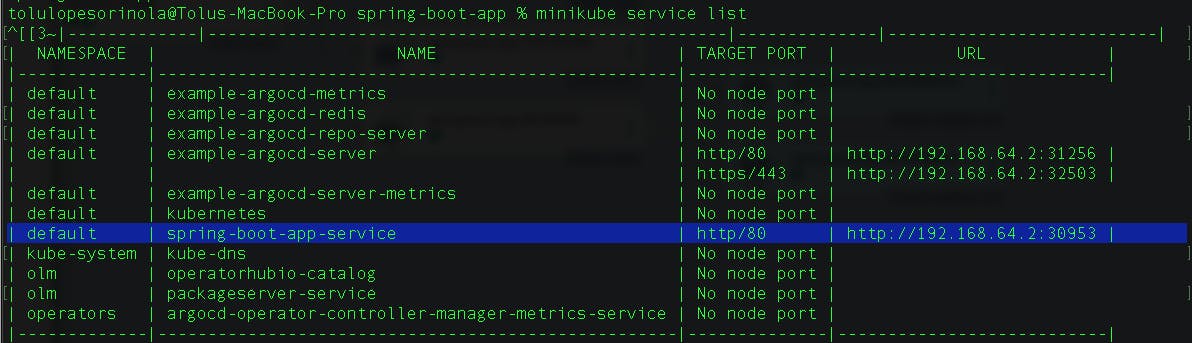
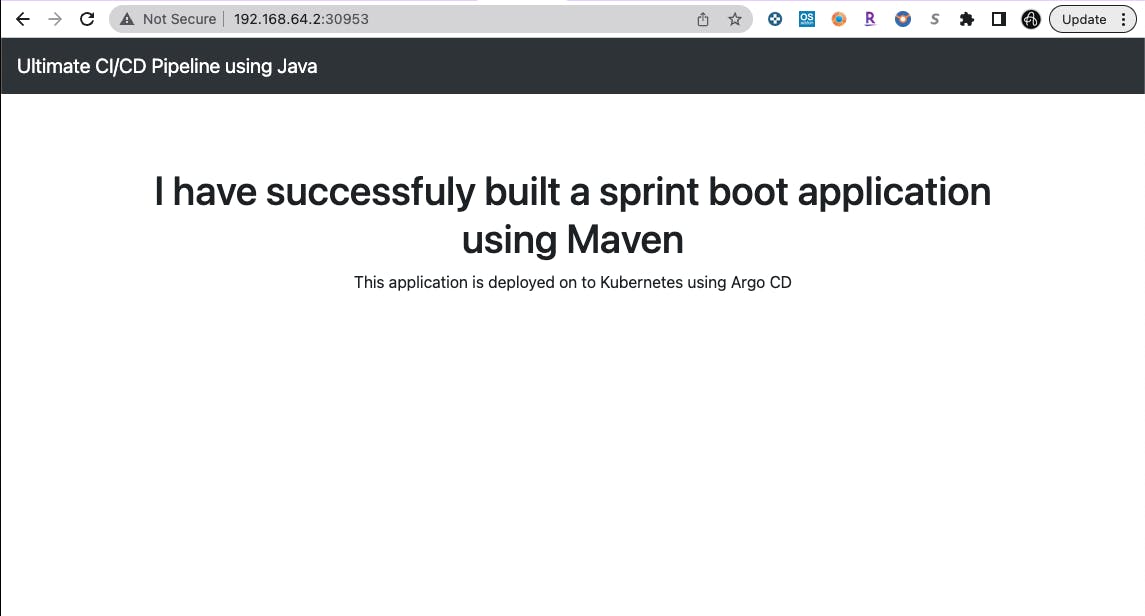
copy the URL into your web browser to view the application
JENKINS FILE
The purpose of using a Docker agent in a Jenkinsfile is to run Jenkins pipeline stages or steps inside a Docker container. Docker agents provide a way to isolate and encapsulate the build environment, ensuring consistency across different Jenkins nodes and improving the reproducibility of the build process.
pipeline {
  agent {
    docker {
      image 'abhishekf5/maven-abhishek-docker-agent:v1'
      args '--user root -v /var/run/docker.sock:/var/run/docker.sock' // mount Docker socket to access the host's Docker daemon
    }
  }
  stages {
    stage('Checkout') {
      steps {
        sh 'echo passed'
        //git branch: 'main', url: 'https://github.com/chorinurholla/Jenkins-Zero-To-Hero.git'
      }
    }
    stage('Build and Test') {
      steps {
        sh 'ls -ltr'
        // build the project and create a JAR file
        sh 'cd java-maven-sonar-argocd-helm-k8s/spring-boot-app && mvn clean package'
      }
    }
    stage('Static Code Analysis') {
      environment {
        SONAR_URL = "http://54.83.168.25:9000"
      }
      steps {
        withCredentials([string(credentialsId: 'SonarQube', variable: 'SONAR_AUTH_TOKEN')]) {
          sh 'cd java-maven-sonar-argocd-helm-k8s/spring-boot-app && mvn sonar:sonar -Dsonar.login=$SONAR_AUTH_TOKEN -Dsonar.host.url=${SONAR_URL}'
        }
      }
    }
    stage('Build and Push Docker Image') {
      environment {
        DOCKER_IMAGE = "tolumonski/ultimate-cicd:${BUILD_NUMBER}"
        // DOCKERFILE_LOCATION = "java-maven-sonar-argocd-helm-k8s/spring-boot-app/Dockerfile"
        REGISTRY_CREDENTIALS = credentials('docker-cred')
      }
      steps {
        script {
            sh 'cd java-maven-sonar-argocd-helm-k8s/spring-boot-app && docker build -t ${DOCKER_IMAGE} .'
            def dockerImage = docker.image("${DOCKER_IMAGE}")
            docker.withRegistry('https://index.docker.io/v1/', "docker-cred") {
                dockerImage.push()
            }
        }
      }
    }
    stage('Update Deployment File') {
        environment {
            GIT_REPO_NAME = "Jenkins-Zero-To-Hero"
            GIT_USER_NAME = "chorinurholla"
        }
        steps {
            withCredentials([string(credentialsId: 'Github', variable: 'GITHUB_TOKEN')]) {
                sh '''
                    git config user.email "tolu@aloniros.com"
                    git config user.name "Tolu Sorinola"
                    BUILD_NUMBER=${BUILD_NUMBER}
                    sed -i "s/replaceImageTag/${BUILD_NUMBER}/g" java-maven-sonar-argocd-helm-k8s/spring-boot-app-manifests/deployment.yml
                    git add java-maven-sonar-argocd-helm-k8s/spring-boot-app-manifests/deployment.yml
                    git commit -m "Update deployment image to version ${BUILD_NUMBER}"
                    git push https://${GITHUB_TOKEN}@github.com/${GIT_USER_NAME}/${GIT_REPO_NAME} HEAD:main
                '''
            }
        }
    }
  }
}